Download Chkk CLI
Follow the steps in the Installation guide to download the Chkk CLI.
Run chkk start
Run the interactive starter to authenticate and register clusters:The Click on the link and a browser window will appear asking you to confirm a
code.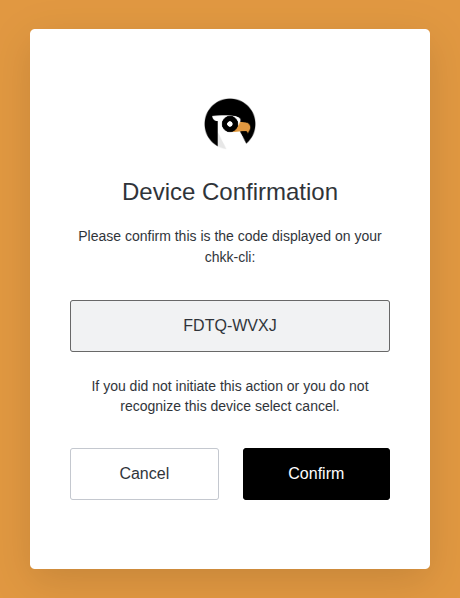
chkk start command will get you started in the Chkk universe.The command will lead you through registering one or more clusters
with Chkk and request a Chkk upgrade assessment for those registered
clusters.Registering a cluster with Chkk is the process of collecting
resources from the cluster and submitting those collected results to
Chkk.Type chkk start in a terminal to begin.Register a Cluster
After clicking “Confirm”, in your terminal you will see a successful login
message and a prompt to register a cluster with Chkk:Hit Enter or “Y” to start the registration process. We will look in your
kubeconfig for Cloud Native Clusters and ask you to select one or more of those
Kubernetes Clusters to register with Chkk.Use the arrow keys to navigate, hit Enter to select one or more of the
clusters and navigate up to the Submit line and hit Enter again.We will ask you to confirm your selection:Hit Enter or “Y” to collect resources from the selected clusters and
register them with Chkk.Your newly-registered cluster will then be displayed along with a
prompt asking if you would like to request a Chkk upgrade assessment for this
cluster:
Review the Upgrade Assessment
A Chkk upgrade assessment is a report that alerts you to potential issues with
an upgrade of your cluster and recommends upgrade versions for your
Cloud Native Projects.Hit Enter or “Y” to select one or more clusters for an upgrade
assessment.select a cluster and hit Enter.The upgrade assessment will take a few minutes to generate and then you will see: